CCTV Services
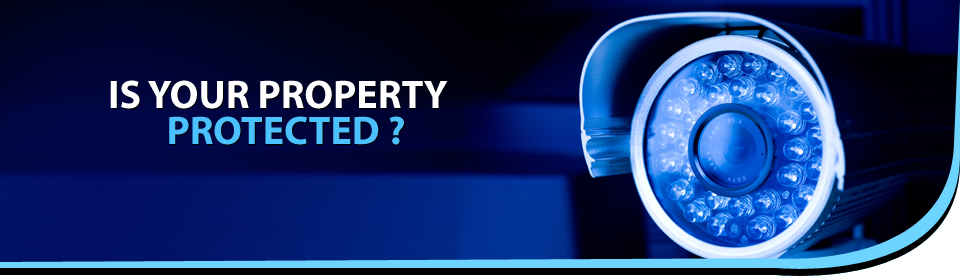
CCTV SERVICE DESCRIPTION
We have built a great depth of knowledge about CCTV, alarms and security and with our team holding over 7 years of experience within the security industry you can rely on us to protect your house or company.
We offer a wide range of services including key holding, man guarding, CCTV installation, intruder alarms and much more. Depending on your requirements, our team of experts can advise you the best way to protect and monitor you, your home or business. Whether you need CCTV remote monitoring or an intruder alarm designed and installed, we can create a truly bespoke product to fit your budget and space. Every installation is carried out by one of our specialist engineers so you can be assured everything will be completed to the highest standard.
We pride ourselves on the customer service we deliver to every client, no matter how small or big the job is, we always ensure that your needs are put first. Not only do we only install CCTV, alarms and other security services but we also offer maintenance packages so you don’t have to worry in case anything goes wrong. Our technicians are available to offer on-site responsive repair 24/7. We can put a stop to those unwanted burglaries, be prepared and stay ahead of the burglars with our professional CCTV and alarm systems.
CCTV TYPES
- Dome CCTV Camera. ...
- Bullet CCTV Camera. ...
- C-Mount CCTV Camera. ...
- Day/Night CCTV Camera. ...
- Infrared/Night Vision CCTV Camera. ...
- Network/IP CCTV Camera. ...
- Wireless CCTV Camera. ...
- High-Definition HD CCTV Camera.
1. Make a diagram of your surveillance needs. It is both expensive and impractical to monitor every square inch of your house, so you need to prioritize what areas you want to watch the most. Draw up a rough diagram of your house or print out the blueprints and note where you might want to place cameras. When you are done, check out each location to make sure it is not blocked by anything and provides the best view possible. You may want cameras for:
- Front and back doors.
- Off-Street Windows
- Large common spaces
- Driveways
- Porches
- Stairways
2. Buy the right package to suit your needs. You can buy each piece individually, but it is generally cheaper and easier to buy bundled security systems. At minimum your system should have 1-3 cameras, a DVR (digital video recorder), appropriate wiring (siamese and BNC cables), and power cords. Unless you are choosing to monitor a large area, wireless cameras with wall mounting should cover your needs.
- Basic Home Security
- Monitoring Valuables/Young Children
3. Alternatively, buy your cameras individually. Once you know how many cameras you need, you'll need to think about what specific cameras you want. A home surveillance system can cost anywhere from a few hundred dollars to well over a thousand, so make sure you consider the type of cameras you need before buying -- the features below should be clearly labeled on the box. While you can buy all of the parts separately, buying a full "surveillance set" is usually cheaper and easier to install.
- Wireless vs. Wired
- Indoor or Outdoor
- Motion Sensing
- Remote Viewing
4. Set up a recording device and monitor. In order to store and view your footage you need a Digital Video Recorder (DVR). This device receives all of the video feeds and broadcasts them onto a monitor, usually a computer screen or small TV. DVRs have a variety of memory capacities that allow them to store a certain amount of video, from hundreds of hours to one day's worth of footage.
5. Test your equipment before installing. Make sure your cables, DVR, cameras, and monitor all work by connecting each one before you install anything.
1. Choose a high, broad angle for your camera. The best angle of any room is usually looking down from the corner where the ceiling meets the walls. Make sure you can clearly see all entries and exits and that the camera is near a power outlet.
2. Mount your camera to the wall. Some cameras come with sticky pads to adhere your camera to the wall, but screwing your camera in is the safest way to mount your cameras long-term. While every camera is different, most of them can be mounted the same way:
- Place the mount in it's desired location.
- Using a sharpie, make marks on the wall where each screw should go.
- Drill a hole for each screw using an electric drill.
- Hammer in any molding pins.
- Screw the mount into the wall.
- Position the camera to your desired angle.
3. Attach your camera to a power source. Almost all cameras come with a power adaptor that plugs into a normal wall socket. Plug the small, round end into the power input on the back of the camera and plug the other end into the outlet.
4. Attach wired camera to your DVR. Surveillance equipment is connected using a BNC (Bayonet Neill–Concelman) connection. BNC cables are simple to use -- they are identical on both sides and you simply plug them into the appropriate port, turning a small nut on the end to lock it in place. Plug one end into your camera's "Output" and the other into one of the DVR "Input" ports.
5. Link wireless cameras to your computer. Wireless cameras will come with a software disc that you need to install to view your feeds. Follow the on-screen instructions to access your cameras.
- Some cameras have a small receiver that attaches to your computer through a USB port. Make sure this is properly attached.
- Write down your camera's IP address (ex. 192.168.0.5) if provided -- this number can be typed into any web browser to view your camera remotely.
6. Attach the monitor to the DVR. This connection frequently uses a BNC cable as well, but some DVR's can attach with HDMI cables, or coaxial cables. Using your preferred connection, attach one end to the DVR's "Output" port and the other to the monitor's "Input."
- You can hook up as many cameras as your DVR has inputs -- it will automatically record every camera you install.
- Note which input you plug into-- this is the input you need to choose to see your cameras.
7. Troubleshoot any connection issues. Check that the camera, DVR, and monitor are all hooked up to a power supply and turned on. Make sure your cables are securely attached and that you have selected the right inputs for your DVR and monitor. Some monitors will display every camera at the same time, others have "input" buttons that allow you to switch between cameras.
1.Create a central "surveillance hub." When you are wiring a lot of cameras at once, you'll need one simple place to bring all of the feeds together to your DVR. This should be a place that is easy to access, and where you can comfortably run wires from anywhere in the house. Attics, offices, and your internet router all make good places to base your surveillance system.
- You should only need one DVR for all of your cameras.
2. Use Siamese cables to wire your system effectively. The most common surveillance cable is a Siamese cable, named because it consists of two cables attached together. One is for power, and the other is for video. This means you will only have to run one wire through your house to set up each camera. The cable is usually sold as RG59 or RG6.
- The braided red and black side is for power. Red is positive and black is negative.
- The singular, cylindrical cable is for video. Each end will have either a BNC attachment or a coaxial cable.
3. Use a power supply box to power multiple cameras through one outlet. Power boxes, available online and in hardware stores for $30-$50, allow you to power you cameras through a single wall outlet. They come with multiple ports, and are great for powering close-together cameras or cameras that aren't near an outlet, like attic cameras. However, you will need to run lengthy amounts of wire to attach each camera to the same box.
- Always attach the cameras before hooking the box to electricity.
- Make sure you buy a power supply box big enough to power each one of your cameras. They should list how many outlets they support on the box.
4. Attach each video cable to a separate DVR port. Your DVR can handle multiple cameras at once, allowing you to record every room in the house with only one box. Your monitor will then display every camera, or you will have to cycle through them using the "input" button on your DVR.
5. Hide your wires. To have a truly professional looking system you can run your cables through the walls and towards your surveillance hub. Be sure you know the layout of your walls and the location of any pipes, cables, or studs as you begin running wires. Running cables requires you to drill a hole in the wall, then thread the cable through the walls to your DVR through open spaces in your house, usually the attic.
- If you are not comfortable drilling into your walls and running cables through, call a professional carpenter or handyman to take care of the cabling.
- You can also secure cables to the walls or baseboards using a staple gun.
- Consider hiding cables under rugs, but tape them down so that no one accidentally trips.
6. Alternatively, call home-security specialists to set up a custom system. There are many home-security companies that will install cameras, motion sensors, and automatic emergency calling for you, though they cost much more than a typical DIY installation. However, if you have a large house, are uncomfortable with wiring, or want extra features like motion-sensors and alarm systems, call a security firm near you.
- ADT, LifeShield, Vivint, and SafeShield are larger, nationwide providers of home security systems.